
The draft contains two part, the yoke and the body. It is open at back for easy in and out. It is easy to make. Any one who knows how to finish a neck line can make this top/frock. Here I have made a frock, to see how the top looks click here.
Take a basic draft for top.

Measure the shoulder, here it is 2.5 inches.
Mark a band around the neck with the width 2.5 inches as shown in the picture.

Cut the band, this is the yoke and the other part is the body. Preserve the body part we need it later.
TO MAKE THE YOKE
FIGURE-A

(click to view larger)
- Fold the yoke as shown in the picture. Keep the yoke on fold(4 layers, this will result 2 yoke pieces).
- Mark it with 1/4 inch seam allowance.
- Cut it.
- This should result an oval as in the picture
FIGURE-B

(Click to view larger)
- Keep the pieces such that right sides faces each other and stitch along the outer edge as in the picture.
- After stitch the outer edge, the yoke band looks as in picture 2
- Make some cuts along the outer edge.
- Turn the band to the right side and press it.
FIGURE - C

(Click to view larger)
Follow the figure C to fold the yoke and find the center part at the back side of the yoke. Cut it, it is the open at the back for button or zip. The yoke is now ready.
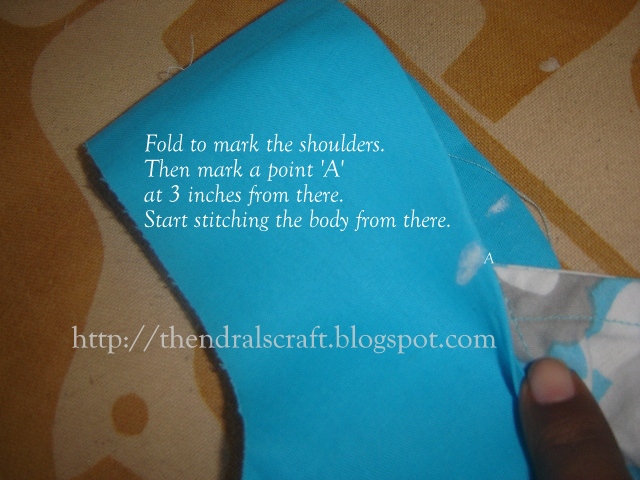
TO MAKE THE BODY

Breadth of the body=Chest+Extra inches for
pleats+ seam allowance
Height= as you wish
If you are going to make a top, 3 inches for pleats is enough, here I am making a frock so I have taken 6 inches (Note note the draft is placed on folded material so 6 inches means 12 inches)
Therefore the,
breadth= Chest+12 inches+seam allowance
breadth= Chest+12 inches+seam allowance
Hope I am clear....Make the back in the same way.

Finish the armhole with bias strips.

I have used box pleats in the front(you can also use knife pleats) and knife pleats at the back. Cut the desired length at the center of the back piece for open

The body is ready.
Now we have to attach the yoke with the body. Stich the yoke such that it overlaps the body.

Join both the front and back with the yoke.

FIGURE-D

- Attach the back and front with the yoke.
- Finish the back opening..
- Finish the neck with piping or as you wish.
- Stitch the button holes and buttons.(sorry the numbers 3 and 4 should be interchanged in the figure)
The dress is almost ready. Join the sides and add ruffles if you wish.
I have added some lace in the neck line and decorated the yoke with small crochet flowers and beads


NOTE:
- Material requirement( for 41/2 yrs old)
yoke: less than 1/2 meter
( you may require more material if you making ruffles
with the same material)
body(skirt):1/2 meter
( you may require more material if you making ruffles
with the same material)
body(skirt):1/2 meter
- You can decorate the edge using lace instead of ruffles.
- Instead a 'back open', you can make it at the shoulders.
- You can use an interface, if you want the yoke to be more stiff.
Hope I am clear and if you have any doubts feel free to ask me. Thank you for your wonderful support and comments, it drives me to create more. Meet you soon...
I am linking this to the parties here
Featured at


